Showing posts with label Passionate Paper Creations and Friends. Show all posts

Wednesday, April 5, 2017

Orchids

This is one of the stamps from the Little Bit Sketchy Orchid (Sheena Douglass collection) at Crafters Companion.  I've coloured it up with the Aquablend pencils (Primary Set) on watercolour paper.


I stamped with an Archival Black and used a waterbrush with the Aquablend pencils.  It was quick and easy.  I also tried the Aquablend pencils on two other surfaces, the Bristol Smooth and Recycled Bristol.  Both with equally good results; however, my fave is with the watercolour paper followed next by the Recycled Bristol (using the "tooth side" of the paper).

The decorative paper is from my stash as are the dewdrops.  The sentiment stamp and cardstock are Stampin' Up and the gorgeous dies I used are Creative Basics dies - the Basic Cutting Edge Borders and Basic Stitched Flags

Thanks for looking and check us out on Passionate Paper Creations & Friends Facebook Group for more inspiration and fun.

~Shelley

Monday, March 6, 2017

Easter Parade of Hats

It's the beginning of a new month with another Progressive Challenge at Bloobel Stamps Facebook Group.

This month we have a whole Easter Parade going.  Lisa couldn't just stop at one image, she gave us 6 to choose from!  I chose Easter Parade Judy and then got her a little sidekick called Easter Parade Marty (the cat).  The twist this month is to dress up/add to those hats.  So, I added a little duckling peeking over the top of Judy's bonnet and maybe hoping that sly cat doesn't see him.

If you didn't play in the previous month's Progressive Challenge, you can still 'buy your way in', by purchasing one of the specific images (the Easter Parade crew) and colouring it up and entering in the Facebook Group.  You can see all the images in the Bloobel shop here.


Copics Used:
Judy -
E50-51-21-11-BV20; E93-RV11; R20-E04
G20-43-C3; C00-1-3
E51-53-55-57
RV52-63-55
G20-21-43
N1-C3-5
YR02-07; Y11-08-17-26
Marty - 
N1-C7-W4-T10-E35; E93-W4
E93-E04 (nose)
C20-43-Y26
C3-5-7-9
Ground and Background -
E42-43-44; Y00-02-"0"

That's it from me for now.  Hope to see you join us in the Bloobel Stamps Facebook Group and also the Passionate Paper Creations and Friends Facebook Group.  Always lots of fun and inspiration happening in these groups.

~Shelley
Monday, February 27, 2017

Sponsor of the Week - LDRS Creative

It's Sponsor Week with LDRS Creative at Passionate Paper Creations and Friends Facebook Group!  Now would be a good time to be a member if you're not already because... LDRS Creative has a special 25% off code this week and it's just for members.  WooHoo!

So I wanted to create something for Sponsor Week but... I don't have any stamps from LDRS (how did that happen?!) but... I have some truly awesome dies that were calling me.  And I needed to show you I'm not just about the colouring lol.


Creative Basics Dies were used along with some retired paper I had at hand.  A little bit of Stampin' Up cardstock and some light sponging and I had a quick and relatively simple, and dare I say "elegant"?, card. 

Dies Used:

  That's it from me for now.  Hope to see you over at Passionate Paper Creations and Friends Facebook Group.

I follow the Mojo Monday challenge blog and thought I'd play along with one of their sketches, just for fun.  Even when their challenges are closed, those sketches are pretty great starts to a card or layout.

~Shelley

Monday, February 13, 2017

Sick?

Definitely love sick lol.

It's Sponsor Week with Bloobel Stamps at Passionate Paper Creations and Friends Facebook Group!  Join us for fun, inspiration and a special discount for members.

Once in a while I see an image (or two in this case) that helps me get the wheels turning with the design/creating process.  These images just needed to be paired together.  I have created a Valentine card but the All Shades of Green would be perfect for a Get Well card and Love Sick would be great for any "love" occasion.


I chose Bloobel Stamps, All Shades of Green and Love Sick

I've used Creative Basics Dies and Embossing Folders (I LOVE the deep, textured design I get from these folders; and I'm slightly [okay, a lot] addicted to the beautiful, clean stitching on the dies) 

Supplies:
Images: Bloobel Stamps, All Shades of Green and Love Sick
Stampin' Up: cardstock, Sealed with Love Stamp Set (current), Word Play Stamp Set (retired), doily
Sizzix: Celebration Words dies
Decorative Paper from my never-ending stash
Coloured with Copics: 
E50-51-21-11-BV20-YG01 (skin) 
Y21-E23-27 (eyes)
E71-77-79 (hair)
R21-24-27 (hearts)
R81-83-85 (outfits)
E42-43-44 (ground)

That's it from me for now.  Hope to see you over at Passionate Paper Creations and Friends Facebook Group.

~Shelley

Tuesday, December 6, 2016

Happy Birthday to a Special Lady

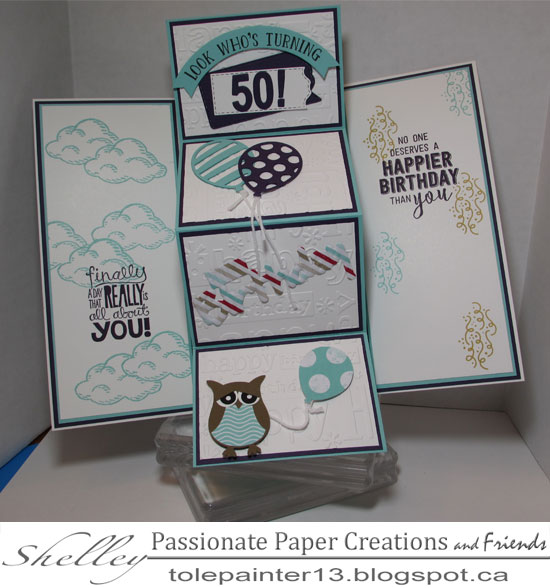
Birthdays are fun.  Colouring and creating cards for birthdays is fun.  Creating a special card for a special lady on a MILESTONE birthday... priceless :-).

So, the card has now been received and I can share.

Happy Birthday RHEA!

And where would I turn for a special image for the card?  Bloobel Stamps of course.  The second I saw the "It's Behind You" (scared man), I KNEW what I was going to use it for.  This special birthday. 

I've made a 5" x 7" Pivot and Twist Card.

Recipe:
Stamp - Bloobel Stamps, It's Behind You
Creative Basics Dies - Basic Stitched Flags
Stampin' Up - Paper, Cardstock, Number Dies, Owl, Balloons, stamps, inks
Medium - Copics on Xpress-It Blending Card
BV20-E50-51-21-11-93 (skin)
B91-95-97-99; colourless blender (jeans)
E53-57-44-59-Y11-YR21 (hair)
BV20-23-25-29 (jacket)
BG11-72-75 (shirt)
B000-95; C3-1-00 (eyes)
C5-7-9 (shoes)
BV20-23-25 (ground)
C1 (outline shadow side)


Happy Birthday, Rhea! xo

Join us at Passionate Paper Creations & Friends Facebook Group.  It's "Birthday Week" and there are games, challenges and fun all week!

~Shelley


Thursday, November 3, 2016

Thanksgiving with Pilgrims and Chocolate

Today I want to show you just how quick and easy it is to create a wonderful table for Thanksgiving using Creative Basics Pierced Ovals.


I have used: Basic Pierced Ovals 

I simply cut a 6" x 6" piece of cardstock, scored it at 3", adhered my decorative paper front and back and then lay the 1/2 oval easel card maker die on the scoreline and ran it through my die cutting machine.  Voila, I had a free-standing place card base to decorate for the Thanksgiving table!


  Simple but I think great to dress up the table (our Canadian Thanksgiving is past but I might be re-purposing this for Christmas dinner or next year). 
 

I used the Thanksgiving Pilgrim from Angels Hearts and Memories Fall bundle release.  She coloured up fairly quickly with my Copics and I think it'd be a great image to "assembly line" for these placecards.  Even changing up the colour of the outfit. 

That fabulous Hershey Kiss Turkey (did you say chocolate?!) is the latest pattern packet from my friend Brenda at Qbee's Quest, be sure to check out her other tutorials while you're there as there is something for almost every occasion you could possibly imagine. 


Recipe:

Creative Basics Dies, Basic Pierced Ovals

Copics - E50-51-21-11, BV02, E93; Y32-E23-25-27-59; Y32-E23-27; E43-44-47-49; Y32-E23-25; G20-24; E40-41-42, "0"

Supplies: Stampin' Up Apothecary Accents Thinlits (retired), DSP (retired), Old Olive cardstock, Gold glimmer paper; Layered Circle Framelits, Owl Builder Punch and Wonderful Wreath Thinlits (for the turkey)

Image: Digital Stamp from Angels Hearts and Memories, Thanksgiving Pilgrim

Qbee's Quest for the Hershey Kiss Turkey

Thanks for visiting today and hope to see you over in the Passionate Paper Creations & Friends Facebook Group! 

~Shelley


Friday, October 21, 2016

Amy Paints

Such a sweet image for a young girl to use for a birthday, thinking of you or just "because" card.


I used the Fancy Squares & Little Things to make a flip card (kind of a reverse easel card).

Copics -
Skin: E50-51-21-11-BV02
Hair: E59-57-34-YR21
Head Scarf: YR21-14-18; RV29-0
Orange: YR21-14-18
Pink: RV23-25-29
Green: G43-YG63-G46
Magazine: E41 and various colours
Ipod: T1-3-5
Ground: E42-43-44; BV25


Friday, September 16, 2016

"Spotlighting" some F-U-N!

Hi everyone!

It's a Power Poppy weekend at Passionate Paper Creations & Friends!  Inspiration, Colouring Contest and more.  You'll want to stop by and check it all out.

I've played with the Pure Prairie Bouqet and taken it in a totally different direction then what I've seen.  This particular image (okay... all of Marcella's images) are so versatile and lend themselves to so very many arrangements through cropping, overlaying and more.  AND this is one of the images on sale for the next 72 hours AND there is even a bundle with this image and 4 more gorgeous images that will tempt you.  Just sayin' ;-)

So, I've used the "spotlighting" technique and printed the image twice on X-Press It Blending Card (the second I actually cropped to save paper).  Then coloured one section with my copics, fussy cut and layered on dimensionals.

I coloured the main flower as a Rudbeckia aka Coneflower or Black-eyed Susan.  There are many variations of colours within this flower species but I've stuck to the traditional 'yellow' as in my garden.  I actually snipped off a couple flowers and plunked them in a glass of water and placed them beside me while colouring (very brave to have open water on my work station/chaos lol).  There's a lot of green in those petals and they're quite translucent.

Flower - Y02-18-YR12-YG01; underpetal - YG01-Y02; centre - Y02-E55-57-49
Stem - G24-94-99
Cast shadows - BV02
Monarch - Y18-YR15-R24
Background - smooshed with a Waterbrush filled with blender solution and Y00 and B41 re-inkers

Cardstock is Stampin' Up.

~Shelley