Well, that's what I'm calling it lol.
 This is a big die so needed a "tall" card to accomplish this. Many cards and projects from the UK and Europe are big, bold cards. I've become a real fan of the big card. Yes it may cost a little more to post to a special friend or family member but when you put this much time, effort and love into a creation I, personally, think it's worth it. Also, I know our Canada Post (and USPS) is not a fan of square envelopes and many of these styles are square BUT... who said it had to go in a square envelope lol?! Make a pretty envelope and put it in a manilla envelope or just make a rectangular envelope for your square card. Problem fixed lol.
The finished size of this project is about 7" t by 7-1/4" w.
Supplies used for this card:
Die-sire Circle Swing Kinetic Base Die
Colorista Aqua Best Wishes Stamp Set
Gemini Set One die
Die'Sire Essentials Words of Endearment die
Vintage Tea Party Doily Delights EF
Spectrum Noir Alcohol Markers
Silver Mirror Card
Gemini Die-cutting Machine
Start with a 7" x 11" piece of cardstock (you can use a wider piece, but then the circles won't give you that overlap effect and any narrower you won't have room inside for a message).
Place your Circle Swing die on the upper left of the cardstock and use the decorative panel piece for placement.
Tape down the Circle Swing die.
Slide the decorative panel die away and run through your diecutter. I've used the Gemini... love it.
Now rotate your paper 180 degrees and repeat the process.
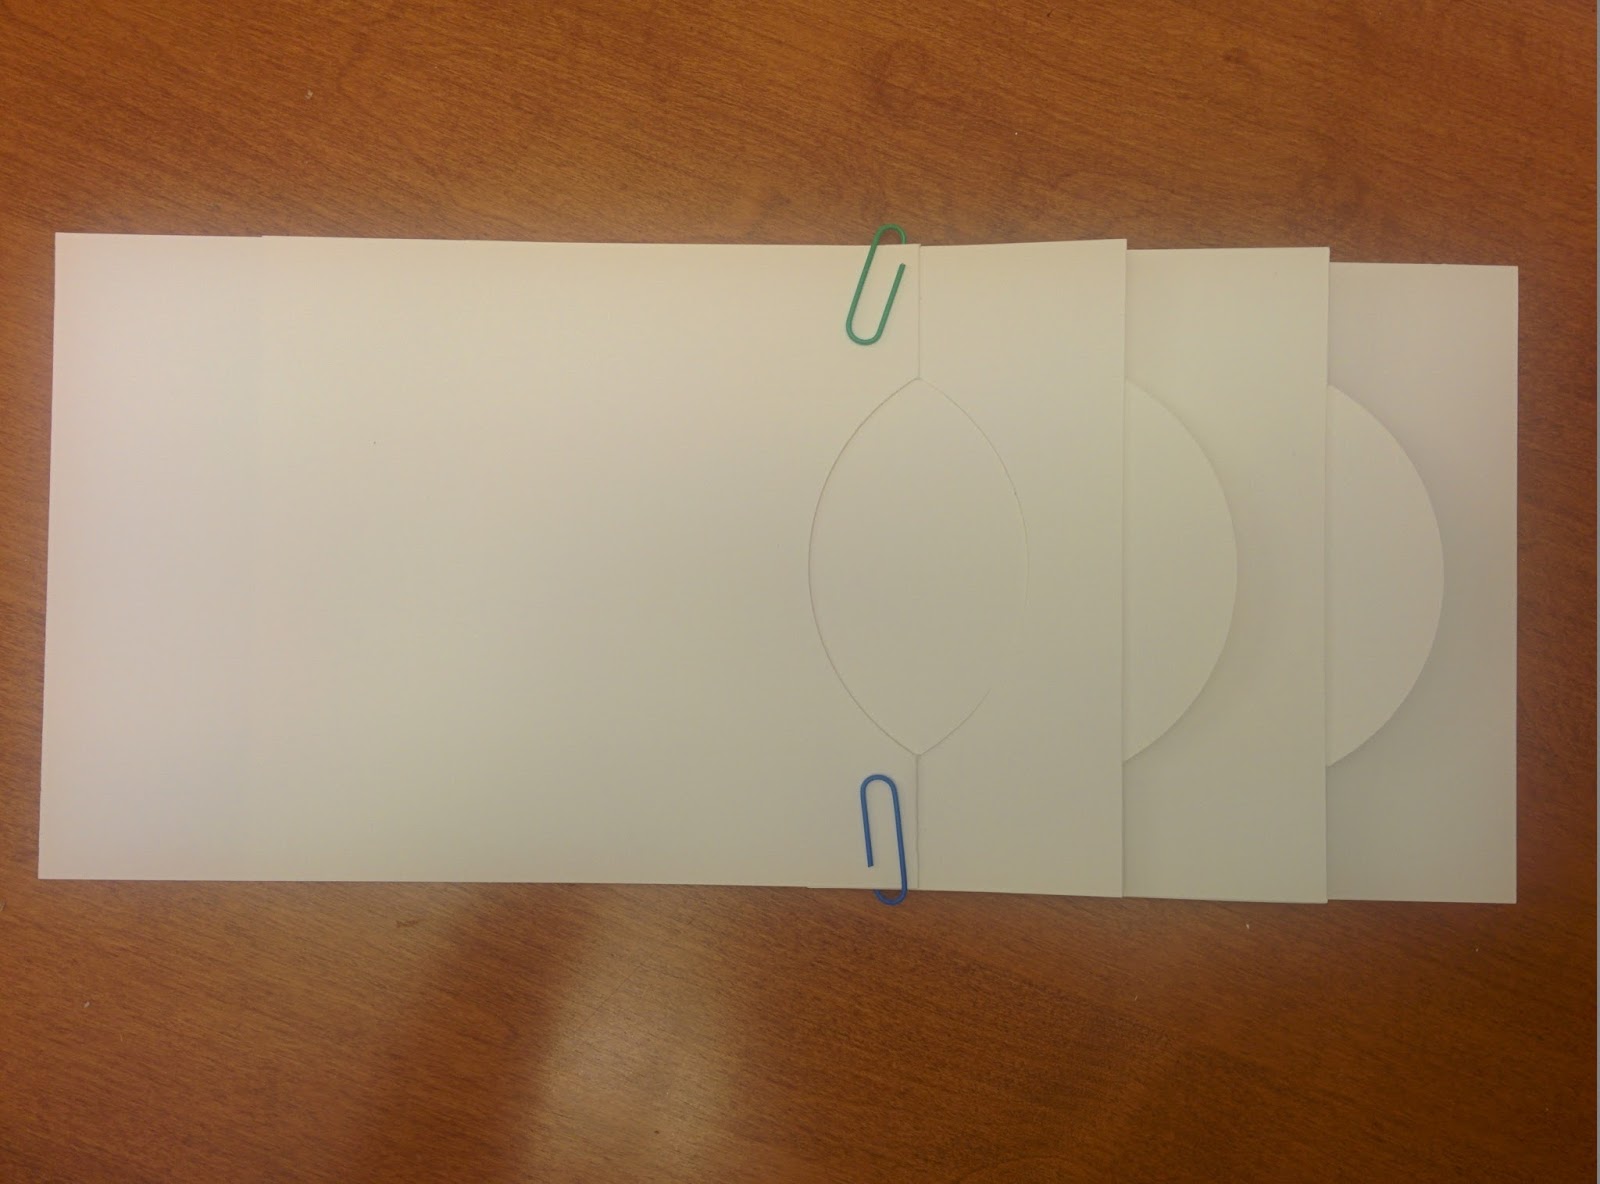
Now, place your diecut cardstock on a foam pad and finish/extend the scorelines with a ruler and bonefolder.
Your cardstock should now look like this. You can set it aside for the time being.
Now the fun part to get a beautifully finished piece. You can use a pencil along with the cutting die and outline the partial circles and cut by hand or...
Cut your next layer to fit the sections. The dimensions of my two outer panels are 2-3/4" x 7" and my center panel is 3-3/4" x 7". So I've cut 2 pieces 2-1/2" x 6-3/4" and one piece at 3-1/2" x 6-3/4". Place the left outer panel and the center panel as per the above photo. Make sure that the two "legs" extend slightly past the cardstock at the top edge. Tack down and run through your machine.
Repeat for the right outer panel and bottom of center panel as per photo.
And VOILA... perfectly cut panels that you can now decorate.
Adhere your decorated panels to the base (make sure they don't impede the circle swing mechanism) and burnish/fold at the scorelines. And you're done. Here's my finished card again.
Thanks for sticking with me this far!
~Shelley