Showing posts with label Crafters Companion. Show all posts

Tuesday, March 6, 2018

Crafter's Companion Die'sire Kinetic Card Bases

These dies can do and are so much more than just a quick and gorgeous card!  I've made 5 different projects with the Crafter's Companion Die'sire Kinetic Circle Swing Base Card; two with the Crafter's Companion Die'sire Kinetic Shutter Base Card.  

In this post, I'll explain the Matchbook-style Album. 


Finished size approx. 6” x 9-1/2”

Cover – 1 pc 6” x 11”; scored at 1-3/4” for back and 1 pc 6” x 8-3/4” for front.  Adhere front piece to 1-3/4” section of back piece
Binding – 4” x 6”; score at 2” on 4” side, then at 7/8” from each end.  Fold and burnish center valley fold and the two ends as mountain folds (this will give you a sturdier binding)
3 pieces 5-1/2" x 11" cut with Circle Swing Base die.  Fold on scorelines as per instructions

  Turn the folded pieces with the swing portion on the right and overlap each front section so that it lines up with the front fold edge of the one underneath (see photos).  Hold them together firmly and clip them together with a paperclip, turn over and trim the left side evenly – the “bottom” piece will be your longest with the top two incrementally shorter.  This can just be done with scissors and doesn’t have to be perfect because this edge will be hidden
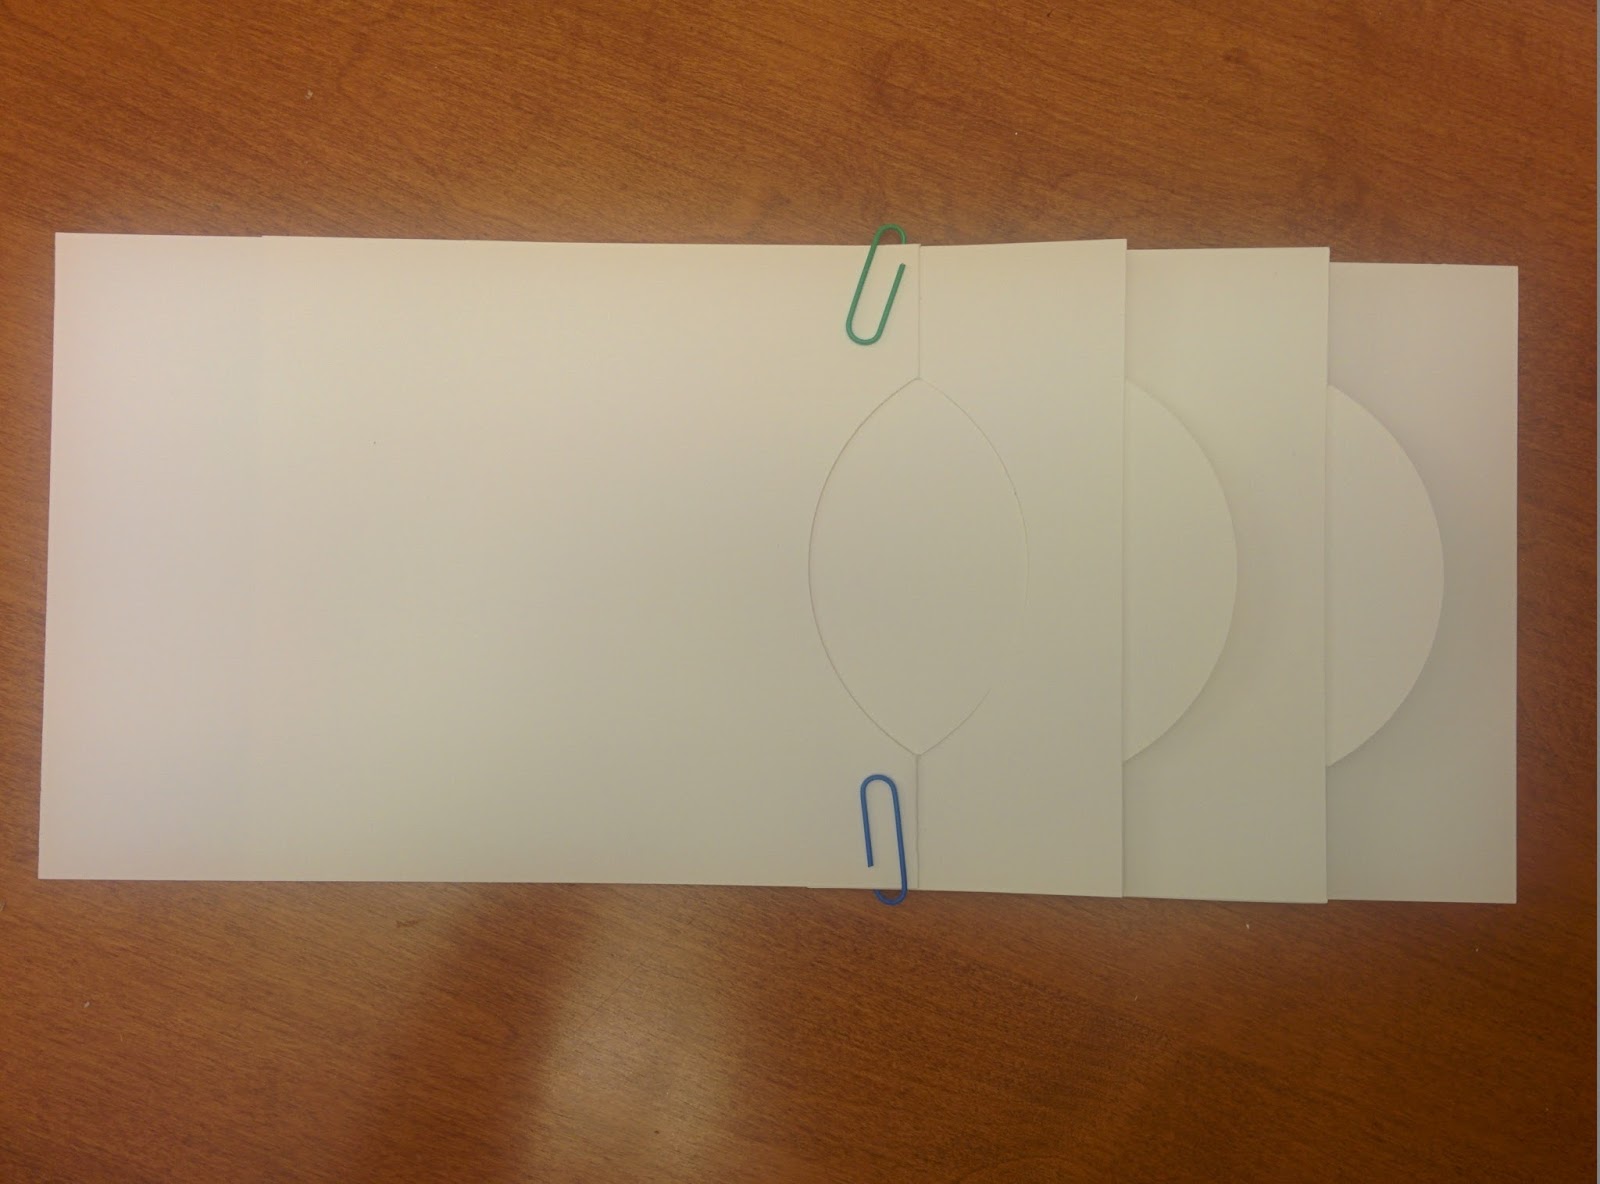

   With the layers still clipped together, slide them onto the back cover, left side even, slide the binding over this and while holding the layers together, punch two holes and secure with ribbon.  The front cover should now slide easily under the edge of the binding.  You “may” need to trim off a titch to ensure it does.


    Note: You can decorate before assembling but don’t use too many layers or embellishments.  Each layer will now swing open with a gentle tug.

Hope you'll try this.

Supplies:
Die'Sire Kinetic Circle Swing Base die
Die’sire Edge’ables “Butterfly Dream”
Colorista Aqua “Best Wishes” stamp set
Spectrum Noir Aqua Markers and Ultra Smooth Cardstock
Shimmering Cardstock Pearl Ivory
Floral Fantasy “Motifs & Accessories” and Bouquet Border
Spectrum Noir Sparkle Marker “Clear”


~Shelley


Monday, June 12, 2017

Fun with Spectrum Noir Alcohol Markers

I've been challenging myself to colour with my Spectrum Noir alcohol markers and having a blast.  Here are some of the pieces I've been working on.


And yes, you do spy some Bloobel goodness there :-)

I will come back and highlight one of the colourings and the markers I used.

~Shelley

Wednesday, April 12, 2017

No colouring!

What?!  You don't say lol.  Occasionally I surprise myself.  I often create cards for my Stampin' Up classes without colouring but there is always lots of stamping and techniques.  More and more colouring/painting is taking over.  This last couple of weeks have been busy and I just haven't been able to find the time or drive to lose myself in colouring but... I needed to be creative.  So I made a bunch of much-needed quick and clean thank you cards.


Supplies: Stampin' Up Butterfly and Dragonfly dies, Hexagon and Butterfly Embossing Folders and cardstock; Creative Basics dies; Crafters Companion, Sheena's A Little Bit Sketchy Orchids; decorative paper from my stash.

~Shelley

Wednesday, April 5, 2017

Orchids

This is one of the stamps from the Little Bit Sketchy Orchid (Sheena Douglass collection) at Crafters Companion.  I've coloured it up with the Aquablend pencils (Primary Set) on watercolour paper.


I stamped with an Archival Black and used a waterbrush with the Aquablend pencils.  It was quick and easy.  I also tried the Aquablend pencils on two other surfaces, the Bristol Smooth and Recycled Bristol.  Both with equally good results; however, my fave is with the watercolour paper followed next by the Recycled Bristol (using the "tooth side" of the paper).

The decorative paper is from my stash as are the dewdrops.  The sentiment stamp and cardstock are Stampin' Up and the gorgeous dies I used are Creative Basics dies - the Basic Cutting Edge Borders and Basic Stitched Flags

Thanks for looking and check us out on Passionate Paper Creations & Friends Facebook Group for more inspiration and fun.

~Shelley